Process a refund
Swiftlier gives multiple options to process refunds, all of which can be done through the Orders and Billing tabs for an Order.
Initiating a refund
To initiate a refund you must first either cancel the entire order or a line item on the order you wish to refund, these actions are done in the Orders tab.
Cancel and refund an entire order
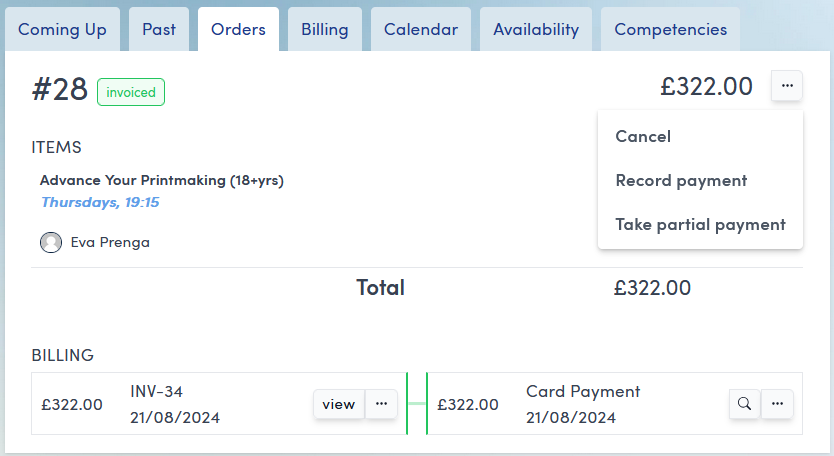
To cancel an entire order press the three dots button  located at the top right of the orders tab next to the order total.
When clicked, this will reveal a drop down containing the option to cancel:
Click Cancel and you will land on the cancellation screen:
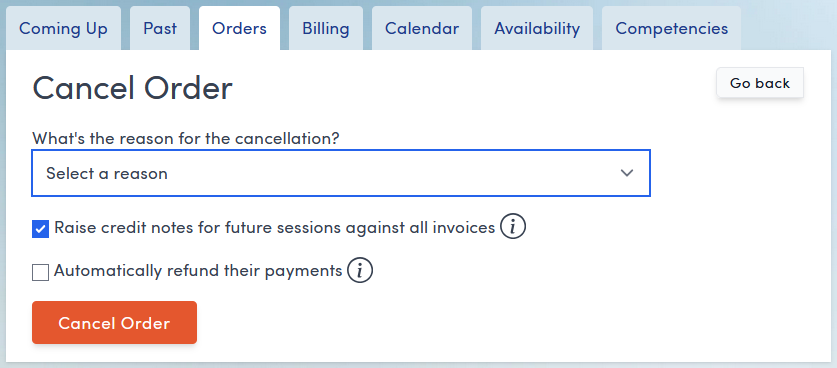
Here you are prompted to:
- Select a cancellation reason from the drop down menu.
- Select whether to raise credit notes against all invoices automatically. If you uncheck this option you will need to create credit notes manually after making the cancellation by clicking the three dots button on any invoice in the Order or Billing tabs and selecting Manually Credit from the drop down menu.
- Select whether to automatically refund the payment. This option is only applicable to payments taken through Stripe and will automatically refund the full amount to the customer's payment card.
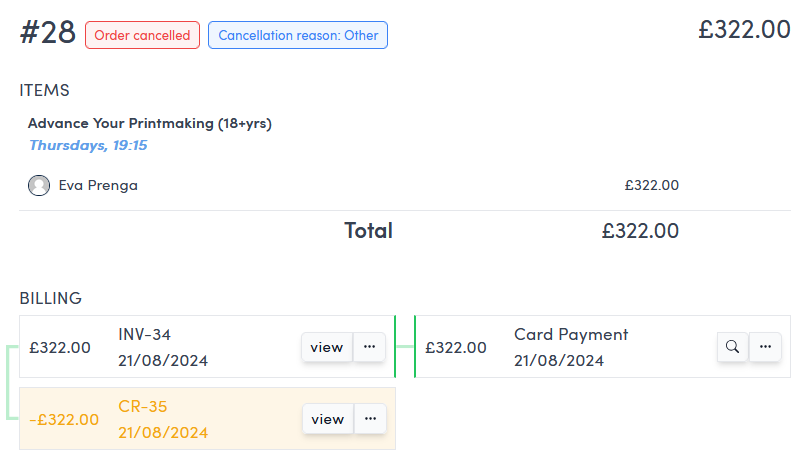
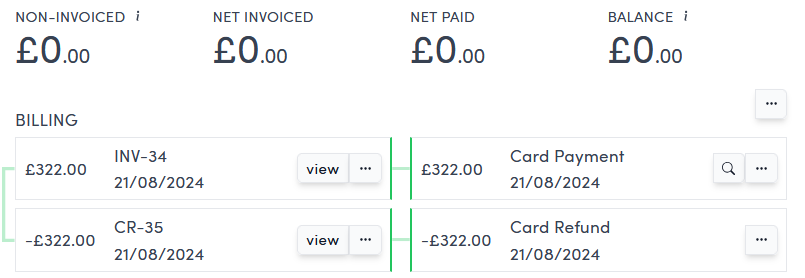
After selecting the appropriate options and clicking Cancel Order a credit note will appear (if raised automatically was chosen) linked to the relevant invoice.
If you chose to automatically refund the payment, a refund will also appear linked to the credit note with a green line.
This refund has already been processed, allocated and will display on both the Orders and Billing tabs. Your refund has been successfully processed.
If you did not select to automatically refund the payment, a refund can be created manually from the Billing Tab (This is the case in the screenshot below).
 Click to go to the Billing tab.
If a credit note has been raised but no refund allocated this tab will display a negative balance and prompt you to process a refund.
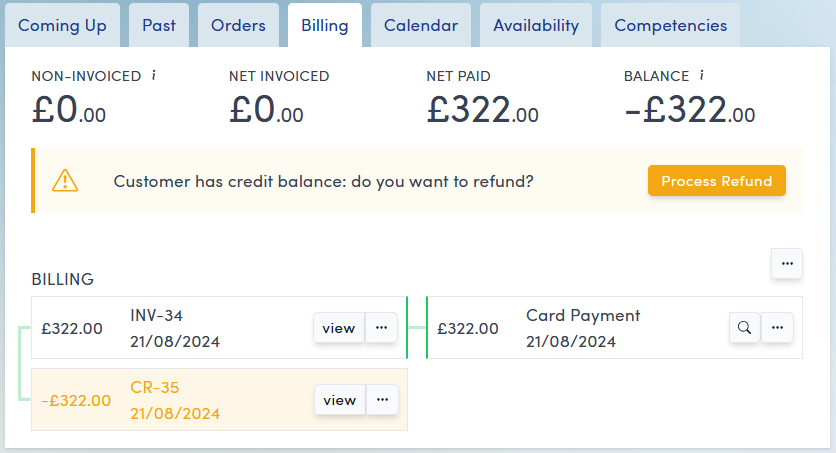
To begin the process click the Process Refund button.
A new group of options will appear:
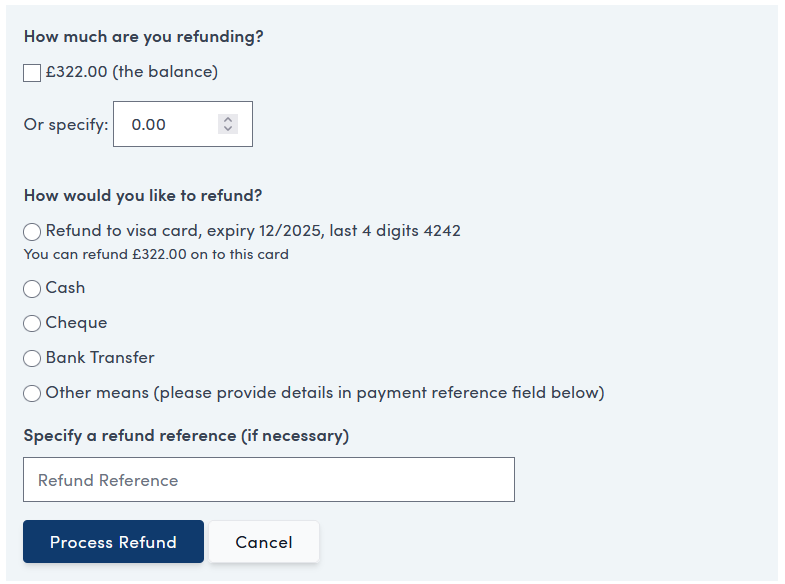
Here you can choose to refund the whole amount or a custom amount.
A custom amount refunded will update the balance on the Billing tab accordingly and you will need to manually refund the rest of the refund until the balance has returned to 0.
The first option in the How would you like to refund? section, if checked, will automatically refund to the customer's original payment card.
The other options (Cash, Cheque, Bank Transfer, Other means) will create an unallocated refund which you can later allocate to the relevant credit note in the Billing tab. See section below titled Allocating an unallocated refund.
You can optionally specify a refund reference.
After deciding on your options, click Process Refund and the refund will appear on the Billing Tab.
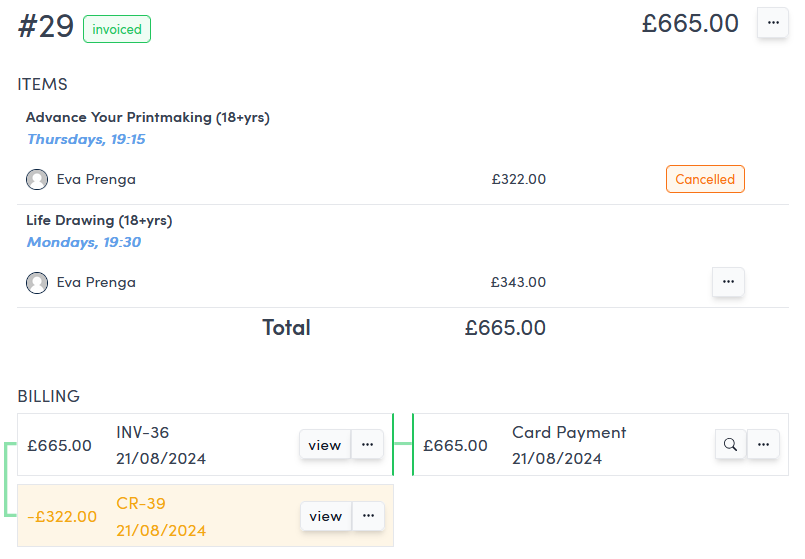
Cancel and refund a line item from an order
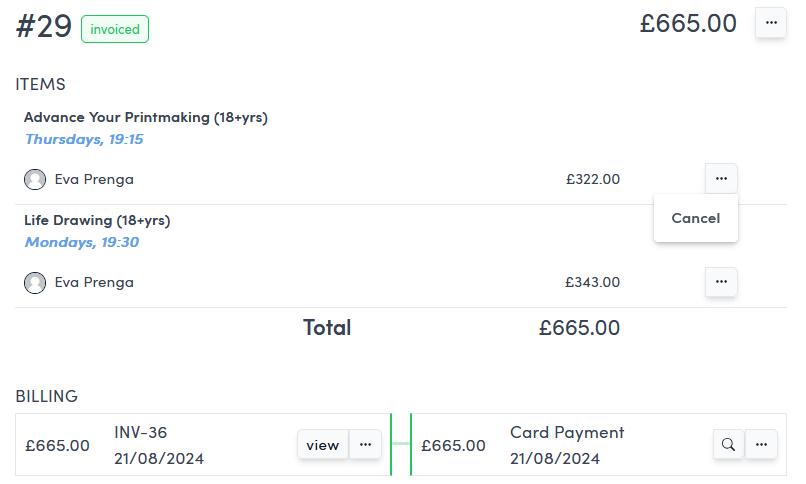
From the Orders tab for the relevant order.
If an order has more than one item, each item will appear with its own three dots button next to the line item.
Click this button and you will be given the option to cancel only that item:
Click Cancel and you will land on the cancellation screen
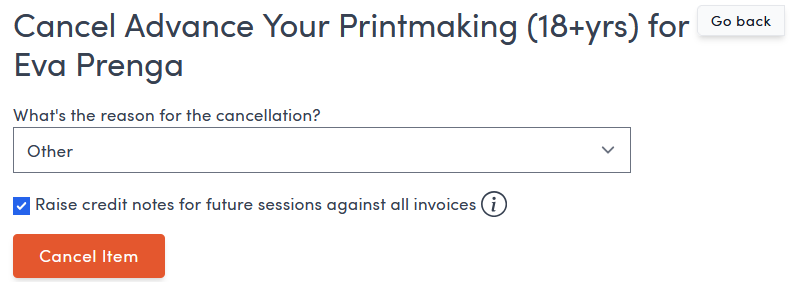
Here you are prompted to:
- Select a cancellation reason from the drop down menu.
- Select whether to raise credit notes against all invoices automatically. If you uncheck this option you will need to create credit notes manually after making the cancellation by clicking the three dots button on any invoice in the Orders or Billings tab and selecting Manually Credit from the drop down menu.
After selecting the appropriate options and clicking Cancel Order, a credit note (if raised automatically was chosen) linked to the relevant invoice and a label showing the line item has been cancelled will appear.
To then process the refund the steps are the same as the section above Cancel and refund an entire order.
Unallocated refunds
When processing a refund in the Billings tab, and accessing the screen below (by clicking Process Refund) you may choose to refund by cash, cheque, bank transfer or other means.
These options will create an unallocated refund which will appear in the Billing tab after you click Process Refund.
As the refund is unallocated, none of the balances will be updated until it has been allocated to the relevant credit note and the refund will appear unconnected (by a green line) to any credit notes.
To find out how to allocate a refund go to the Allocation types and how to allocate section.